If you’re running ads (like Facebook or Google), UTM tracking lets you see exactly which ad, ad set, or campaign generated each lead or scheduled call. It also works for tracking organic traffic.
With UTM tracking, you can:
See which ads generate the most leads
Identify your highest-converting campaigns
Track performance across channels (Facebook, Google, email, etc.)
Send enriched lead data into GoHighLevel
Inside your Facebook ad, you can have Facebook dynamically auto-add UTM parameters to your final URL.
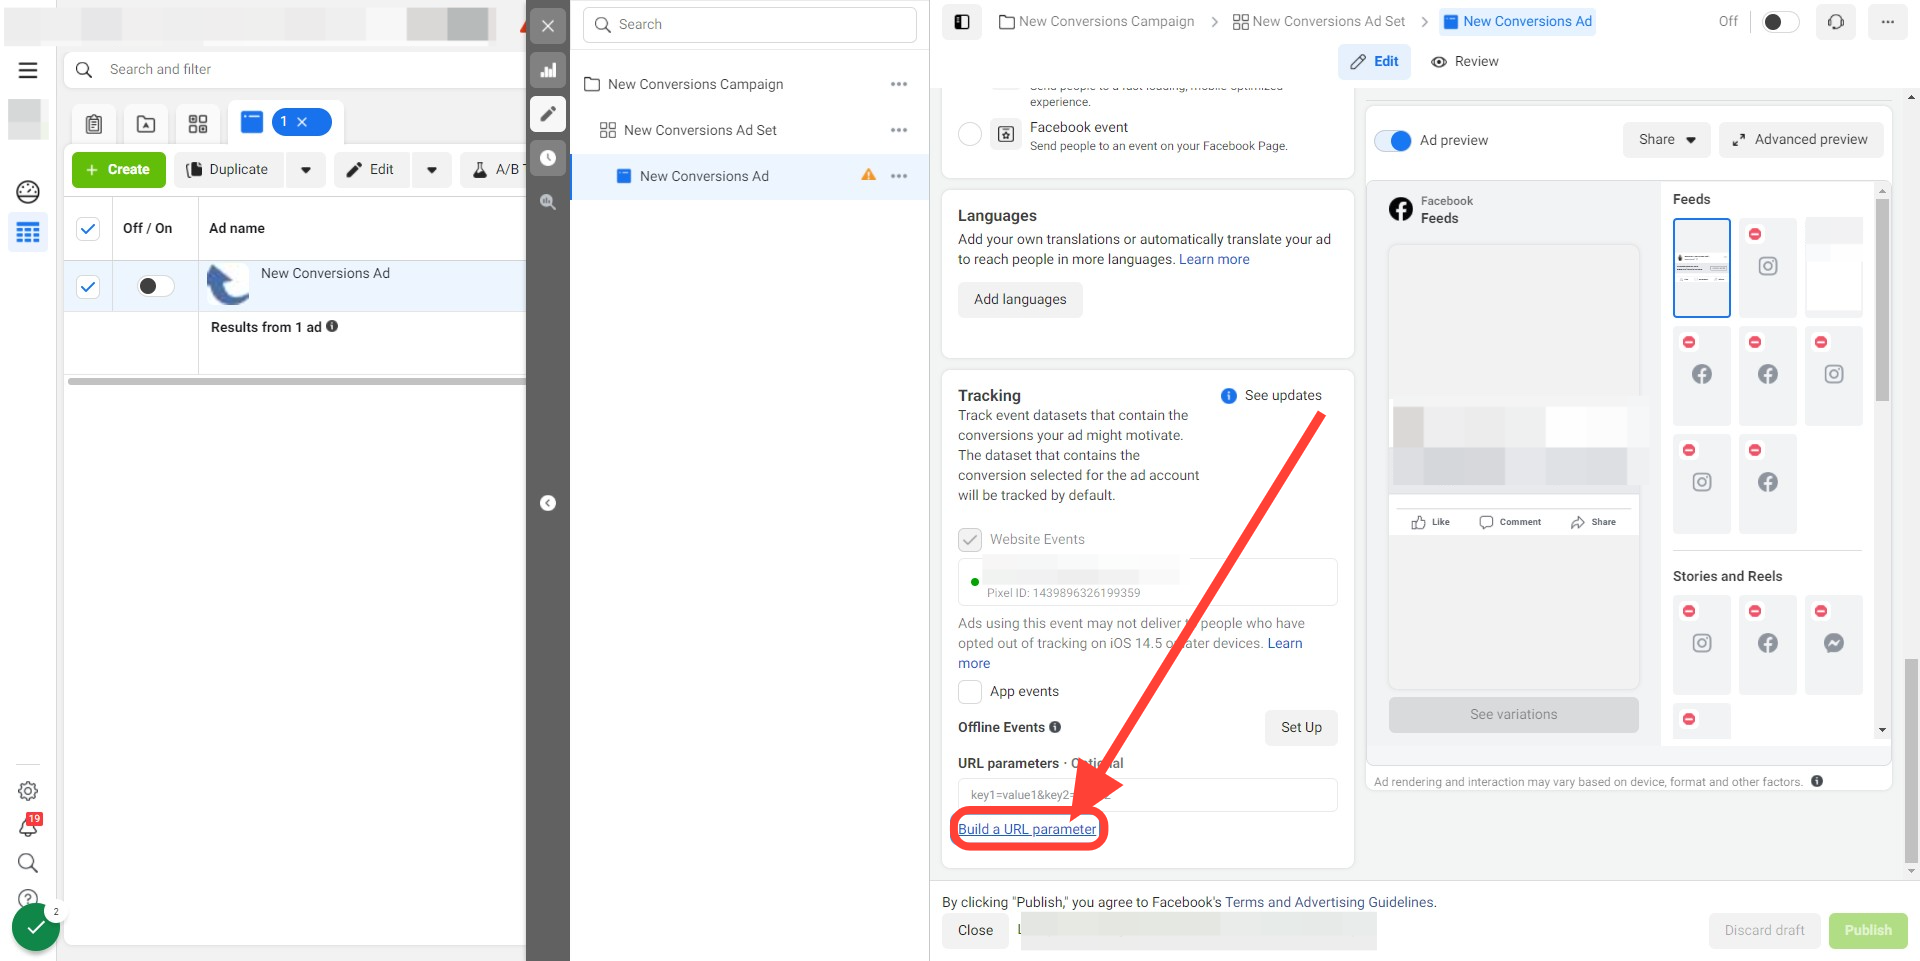
For example:
?utm_source=facebook&utm_medium=adset_usa_only&utm_campaign=vsl_test&utm_content=ad_withcrazyhookHere’s an example of what each part would represent:
utm_source=facebook → Traffic came from Facebook
utm_campaign=vsl_test → Your campaign
utm_medium=adset_usa_only → The specific adset
utm_content=ad_withcrazyhook → Specific ad creative
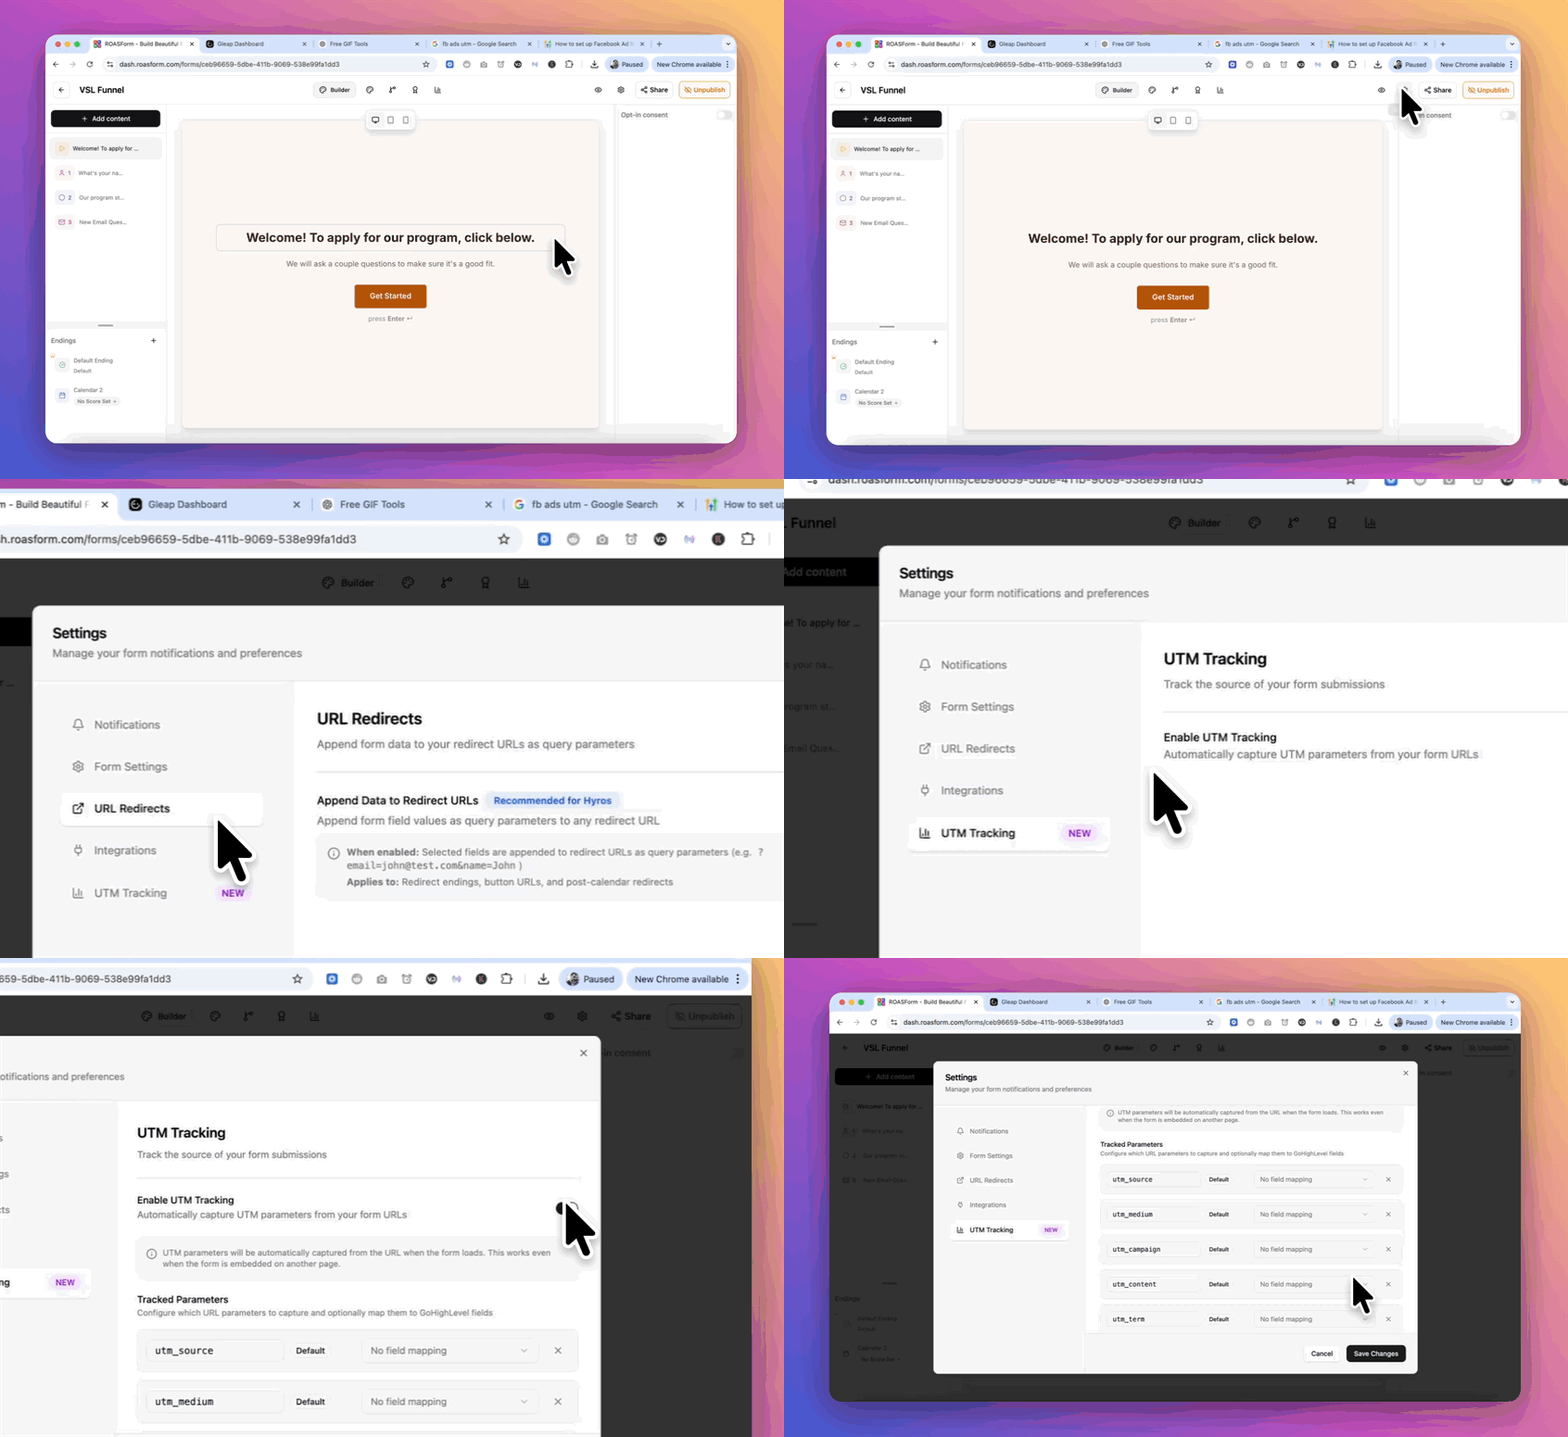
Open your form
Click Settings
Go to UTM Tracking
Toggle Enable UTM Tracking ON
Once enabled, ROASForm will automatically capture default UTM parameters and save them to each submission.
However, you can also add custom URL or UTM parameters. Simply scroll down to “Add Custom Parameter” and add any other parameters you want to track.
Add fbclid (listed as Facebook Click ID under Suggested Parameters) if you want the Facebook click ID saved to a GoHighLevel field. ROASForm already captures it for its own Conversions API.
To actually use your UTM data in GoHighLevel (for reporting, automations, filtering, etc.), you need to map each UTM parameter to a custom GoHighLevel field.
In your GoHighLevel sub-account:
Go to Settings → Custom Fields
Create fields for each UTM you want to track:
Recommended fields:
UTM Source (for the traffic source)
UTM Campaign (for the specific ad campaign)
UTM Medium (for the specific adset)
UTM Content (for the specific ad)
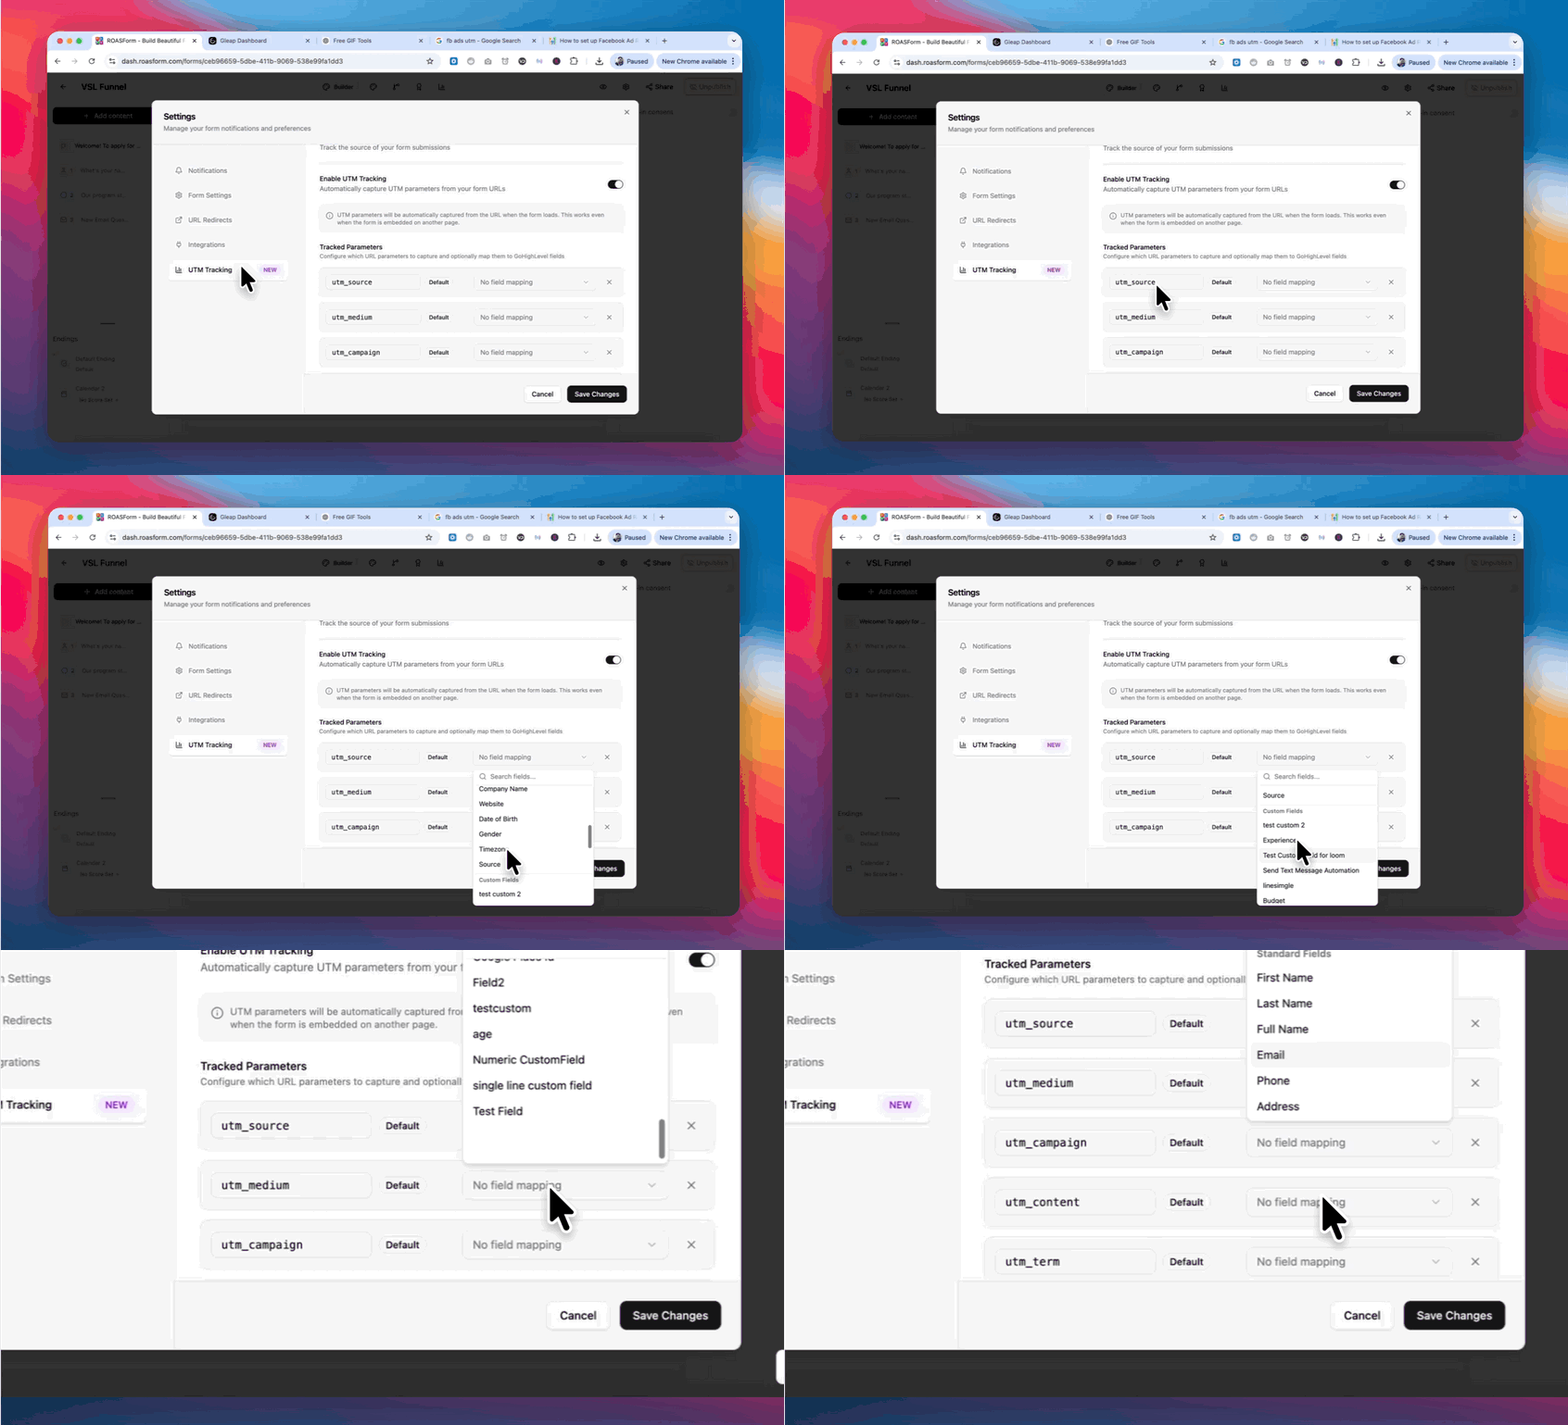
Under Tracked Parameters, you’ll see each UTM (e.g. utm_source)
Click No field mapping, then search for or select the matching custom field from GoHighLevel
Once all your fields are mapped, make sure to click Save Changes!
Once everything is set up, every lead in ROASForm is no longer just a name and email.
It becomes:
👉 a fully attributed lead
👉 tied to a specific campaign, adset, and ad
🚀 ready for smarter scaling decisions