When someone schedules a call, you want Meta to know exactly who booked it so your ads can target more people like that. Here is the easiest way to set that up using a Thank You Page and a GHL Automation backup.
The simplest way to track a scheduled call is to send people to a thank-you page after they book.
Create your page: Build a simple "thank you / success!" page in your funnel.
On your thank-you page, add your Meta Pixel code. Make sure it includes the Schedule event. This tells Meta: "Someone landed here, which means they definitely booked a call."
The Redirect: In ROASForm, click your Calendar ending, find After booking in the panel on the right, and select Redirect to URL. Paste the link to your thank-you page.
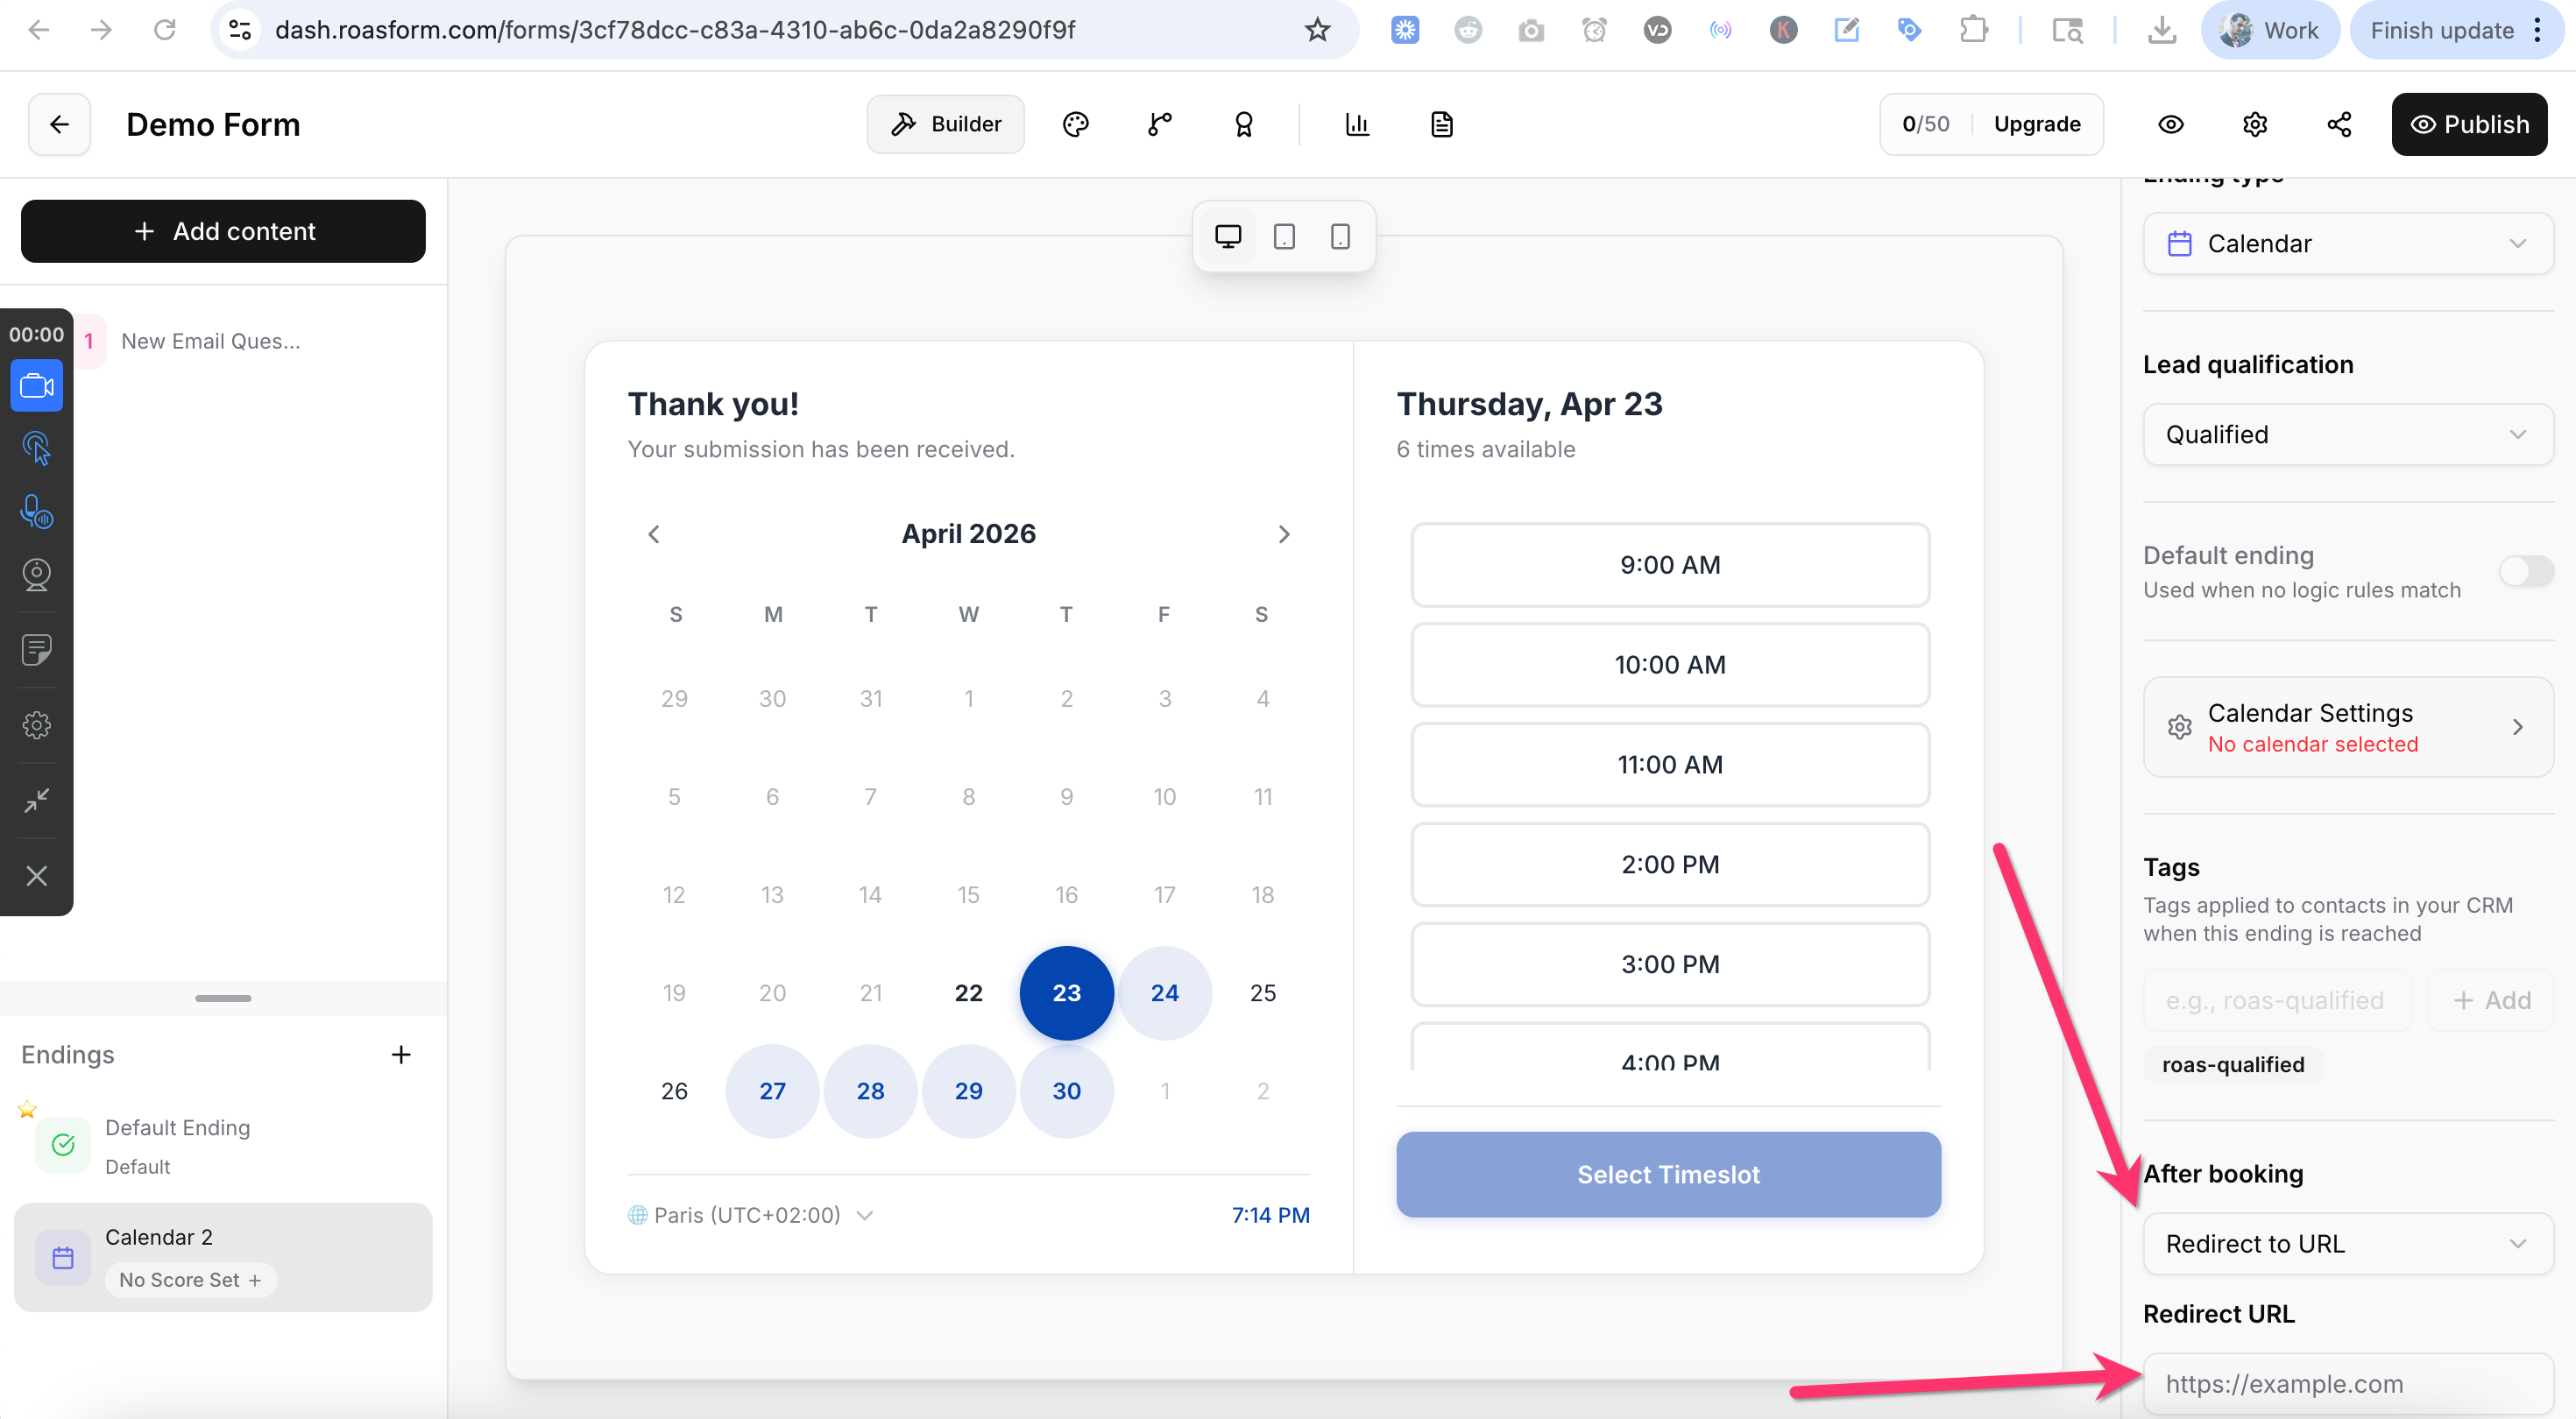
Sometimes browsers block the Meta Pixel (for example, ad blockers). To make sure you catch 100% of your bookings, set up this quick automation in GoHighLevel:
The Trigger: Start a new Workflow with the trigger Appointment Status. Optionally filter down and select the calendar(s) you’re using in ROASForm.
The Action: Add the action Facebook API Lead Event.
The Setup: Choose Schedule as the event name, and save your automation.
It’s not mandatory, but by firing the Meta Pixel on your thank-you page AND the CAPI Automation, you’re basically double-confirming. If the browser misses the conversion, the conversion API automation catches it. Meta is smart enough to see both and only count them as one single booking.
If you want to track everyone who submits your form (even if they don't book a call yet), use these methods:
If you just want to track a standard form submission:
The Redirect: Send finishers to your thank-you page with a Redirect ending (or a Calendar ending with After booking set to Redirect to URL, as explained above).
The Pixel: Place your Pixel on that page with the Lead event.
This is the "Pro" move. If someone starts your form, or fills out your form but leaves without booking, you can still track them in Facebook as ‘lead’ conversions using tags and the Conversions API.
The Trigger: Create a GHL Automation triggered by Contact Tag Added.
The Tags: Use the tag roas-abandoned if they started but didn't finish.
Use the tag roas-qualified for leads who finished the form and reached a qualified ending. Leads who go on to book also get roas-booked, so exclude that tag if you only want the ones who didn't book.
The Action: Add the Facebook API Lead Event action and select Lead